You wouldn’t be wrong if you think of Zoho CRM as a well-oiled machine to help manage all your customer relationships – literally, from start to finish.
Even when a Deal has reached its final phase, Zoho CRM rightfully navigates you to close the opportunity with an efficient payment procedure. Invoices play a vital role in this picture as they are crucial for Sales and Accounting purposes.
This blog gives you a clear-concise understanding of Invoices in Zoho CRM. Here you go!
In simple terms, an invoice is a document you as a vendor issue to your customer on selling goods or services. It is a record of goods or services sold and implies that the customer owes you money.
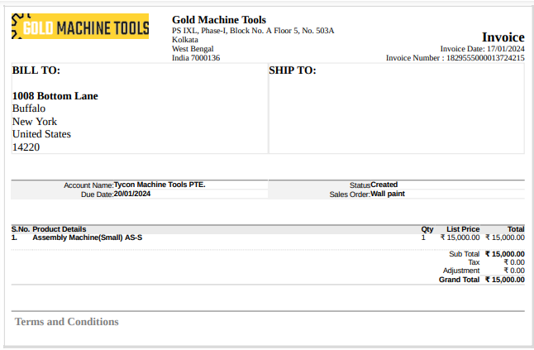
Invoices works the same in Zoho CRM. Here the record usually contains the Purchase Order reference number, Date, Billing Address, Shipping Address, Terms of Payment, and Line Items (products/services) with quantities and prices. In a typical organization, invoicing completes the sales process and begins the accounting process where the Accounts/Finance teams manage accounts receivable.
In Zoho CRM, you can create invoices directly from the Contacts, Accounts, Deals, Quotes, or Sales Order modules.
Adding an invoice in Zoho CRM is a matter of a few minutes. This cloud-based software offers two prominent ways to create and add your invoices conveniently.
The foremost thing that you need to do to create an Invoice in Zoho CRM is to update the Product details.
After you log in to your Zoho CRM account, tap on the More (ellipsis) button. Select Products from the drop-down module menu to view all the records in one place. Here, you can capture all the related information that you need. Whether you sell physical goods or services as your products, you can document all the details including your inventory. Regulating the Product module becomes crucial as you issue an invoice to bill your customers.
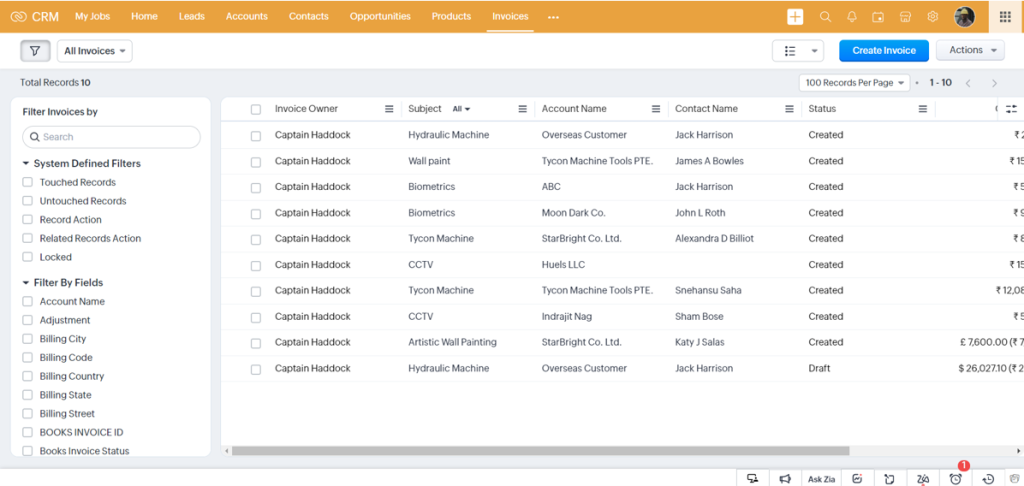
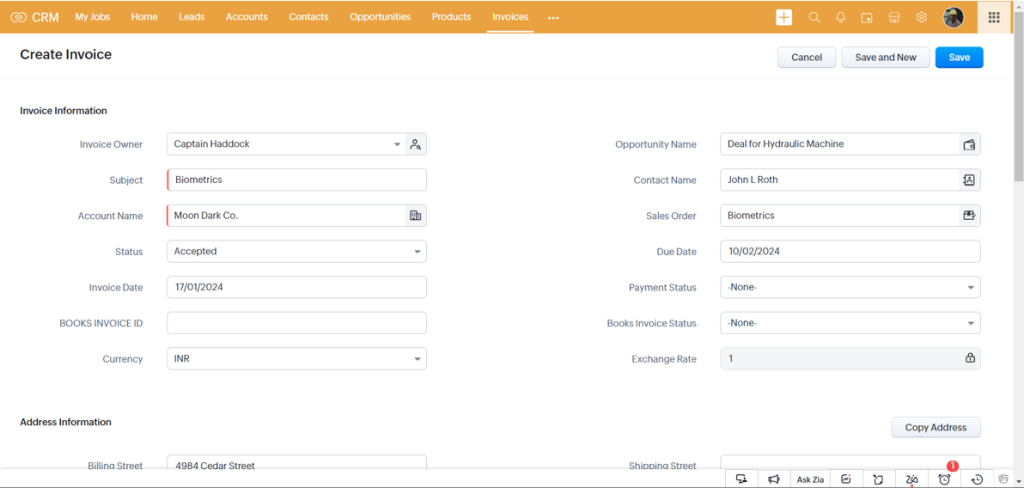
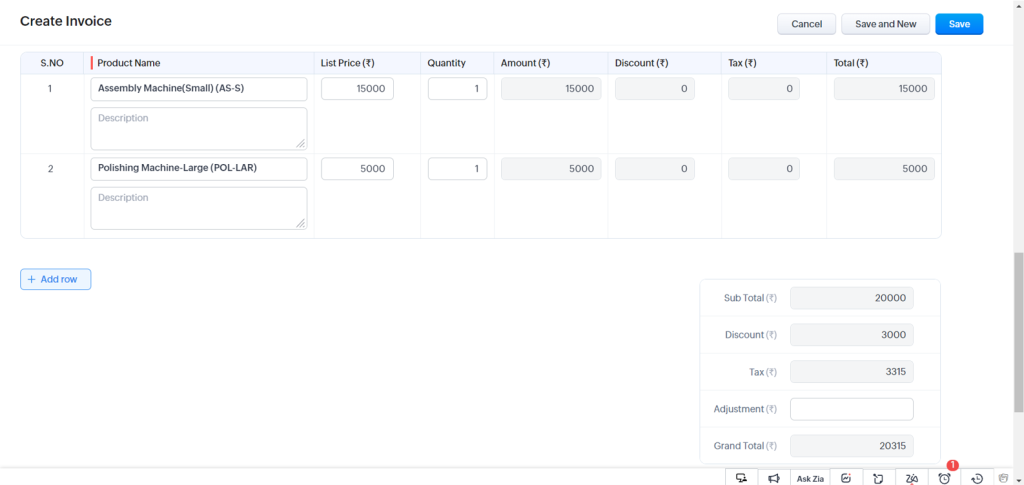
Once you finish with Products, select the Invoices module and click on the Create Invoice button to add a new invoice. Enter all the details in the information fields and under the Product Details section, click Add Line Items. The system pops up the Choose Products option. You must type in at least one character of the Product Name or Product Code to search and choose the desired product from the drop-down. It is important to note that the search results are affected by the words separated by spaces. If you want to know more about the selected Product, point your mouse to the Info icon to view details. Enter the desired quantity of the selected Product. You can add more product lines as required – you can add up to 200 line items.
Clicking on the Add Products button will pre-populate the required details for the chosen items including taxes, price book discounts, and product descriptions. You can drag and drop the line items in case you want to reorder the product lines. To add the list price from an associated price book, click the Price Book Look Up icon to browse and select the desired price book. If discounts or taxes need to be included in the invoice, enter the percentages for the individual fields and the system will automatically calculate the amount.
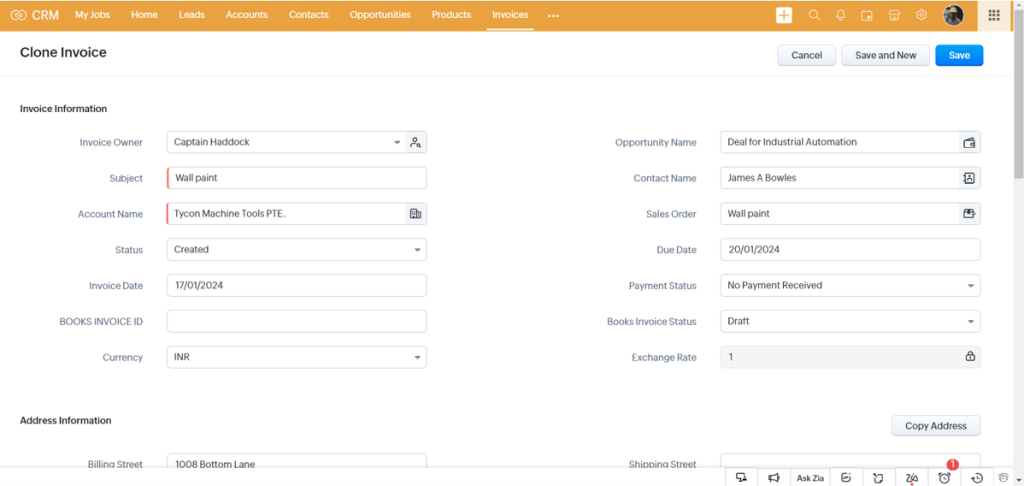
There are situations where you want to create a transaction similar to an already existing one to send to your customers. In such cases, you can copy an already existing transaction. Click on the More icon in the top right corner and select Clone once you enter the Invoice Details page. Now, you will be navigated to a new creation form where the details from the transaction will already be populated, wherein the date will be the date on which the transaction is cloned.
The rule of thumb in Zoho CRM is that you always get a 360-degree single view of all your clients. This means, all the records related to one particular client get interlinked with each other. So there is no need to toggle in between screens.
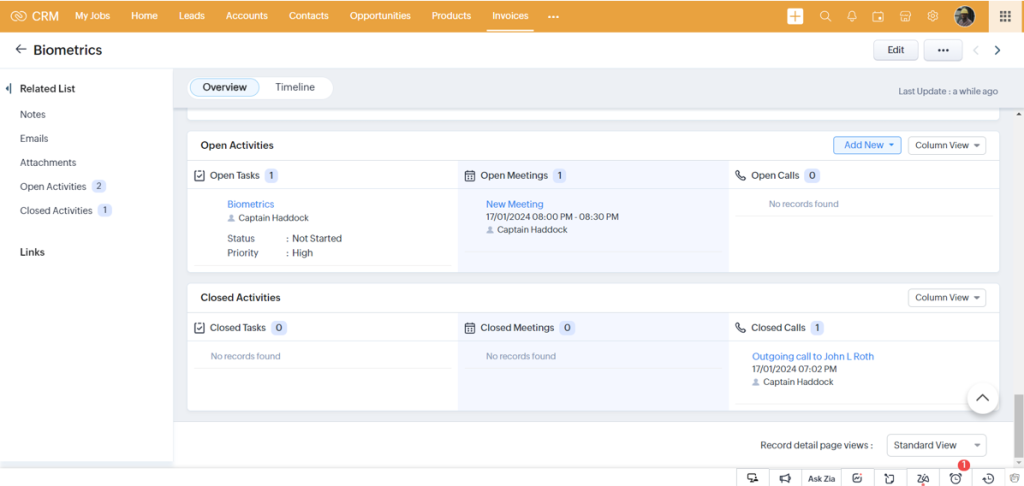
Remember, you are documenting your invoices primarily for your clients to whom you sell your products. In Zoho CRM you can assign them from the Contacts, Accounts, and Deals directly. This consumes less time and brings out more efficiency. You can associate an invoice with other records such as Attachments, Emails, and Open and Closed Activities, in general.
Creating lasting impressions on your clients works wonders in business. It’s not only about the firsts, but it is also about maintaining the momentum throughout the customer journey.
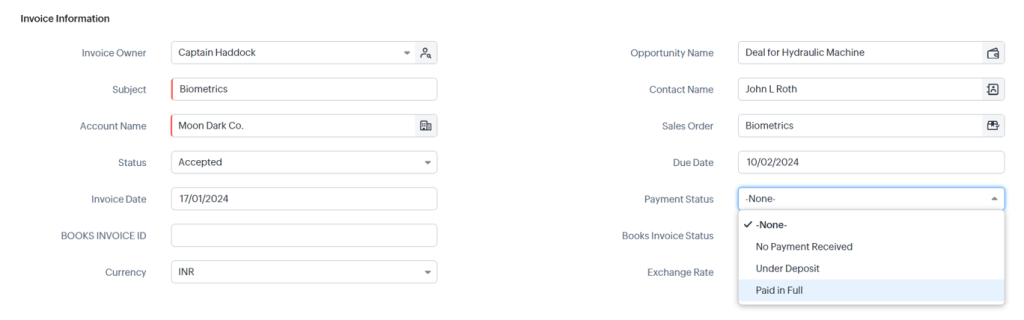
Though several standard fields are already available in the system, you can always customize the fields to the invoice creation page per your business preferences. To create a custom field, click the Gear icon in the top-right corner of the window and select Preferences. Next, you need to select the Invoices sub-module, click on the Field Customization tab, fill in the details, and click Save.
Coming to templates, you can use templates that come in handy with Zoho CRM, to display information. You can also customize your templates as per your brand style and theme.
To customize the invoice template directly from the Invoices module, open the module in the left sidebar and select the invoice you want to customize. Point our mouse cursor over the invoice and click the Customize dropdown menu in the top-right corner of the invoice. Here’s an example.
Zoho allows you to attach files to an Invoice in the CRM. Attach files to an invoice by clicking on the Invoices module and selecting the invoice to which you want to attach a file. Next, click the Attachment icon and a pop-up is visible. Select Cloud to upload the file from the cloud. Choose the file (including bills, documents, sample files, product photos, etc) from the appropriate storage drive and click Attach. Or, you can select Drag & Drop to upload the file from a device or drag and drop the file into the pop-up.
To avoid confusion, it’s best to update an invoice status as you proceed through the sales journey. For example, you can mark an invoice as Sent as soon as you send it to your customer. In case you haven’t sent the invoice as an email but would like to mark the invoice as sent, you first need to go to the Invoices module. Then, select the draft invoice you want to mark as sent. Click the More dropdown in the top-right corner of the window and select Mark as Sent. The invoice will then, be marked as sent but the invoice won’t be sent as an email.
After you’ve sent your invoice to your customers and if they haven’t paid the invoice amount to you, you can send them a payment reminder email requesting them to pay the amount.
To send a payment reminder you need to navigate to the Invoices module and select the invoice for which you want to send the payment reminder. Click the More dropdown menu and select Send Reminder. Edit the email content and click Send to send the remainder. The email will be sent to the customer’s email address.
We often notice that there are customers who inform us about certain payment dates beforehand. In such cases, you can record the expected payment date for the invoice and configure the reminder based on the expected payment date. So that, the CRM can remind you before or after the expected date based on your reminder configuration.
Navigate to the Invoices module and select the invoice for which you want to set the expected payment date. Click the More dropdown menu, click Expected Payment Date, choose a date, and enter a description for setting the payment date. Click Save.
Performing tasks manually is medieval. Bring in a little modification – automate critical tasks with Zoho CRM. It is cost-effective and reliable software that reduces time consumption with zero business risks. Since it manages and centralizes all your business operations, you can use it as your in-house invoicing tool to simplify your billing process. You can generate hundreds of invoices using customizable templates to deliver them in the best way possible and run smooth.
Your CRM is your biggest business asset. Hence, you must consider how you can make your customer experience better at every step of the sales journey. Our experts are here to help!